Asphalt Contractors Near Me: Why Local Matters More Than You Think
How Asphalt Is Laid
parking lot striping
repair driveway concrete
ADA requirements for parking lots
Accessible Parking
Asphalt Parking Lots
HOA Maintenance
Driveway Fix
concrete patio ideas San Jose

Asphalt Contractors Near Me: Why Local Matters More Than You Think

Asphalt Contractors Near Me: Why Local Matters More Than You Think

Wondering which asphalt contractors near you are actually worth hiring? Here’s why working with a local team like Calvac Paving makes all the difference.

Facebook
LinkedIn
Twitter
Pinterest
Asphalt Contractors Near Me: Why Local Matters More Than You Think

If you’ve ever typed “asphalt contractors near me” into Google, you’re probably looking for someone local, trustworthy, and experienced to take care of your pavement. Whether it’s a cracked driveway, a faded parking lot, or a brand-new construction project, finding the right contractor can make all the difference.

At Calvac Paving, we’ve been laying asphalt across San Jose and the Bay Area for over 50 years. In this post, we’ll break down why hiring local really matters—and what to look for when you’re searching for a reliable asphalt contractor near you.

Why “Near Me” Isn’t Just a Keyword—It’s a Smart Choice

Searching for asphalt contractors near me isn’t just about convenience. It’s about choosing a team that understands your environment, your city’s building codes, and even how the local weather impacts pavement over time.

Here’s why local matters more than you think:

They Know the Area

From soil types to city requirements, local contractors like Calvac Paving have the inside knowledge to get the job done right the first time.

Faster Response Times

Need a quick quote? Emergency repair? A local crew is nearby and ready to roll—literally.

Supporting Local Business

When you hire a local company, you’re investing in your community. It’s a win-win for your property and your neighborhood.

Asphalt Repair Contractors Near Me

Not all pavement problems require a full replacement. If you’re dealing with cracks, potholes, or uneven surfaces, searching for asphalt repair contractors near me is the right move. At Calvac Paving, we offer reliable asphalt repairs that extend the life of your pavement without the cost of starting from scratch. Our team uses high-quality materials and methods to patch, seal, and smooth out damaged areas before they become bigger issues.

Asphalt Contractors Near Me: Why Local Matters More Than You Think

Asphalt Sealcoating Contractors Near Me

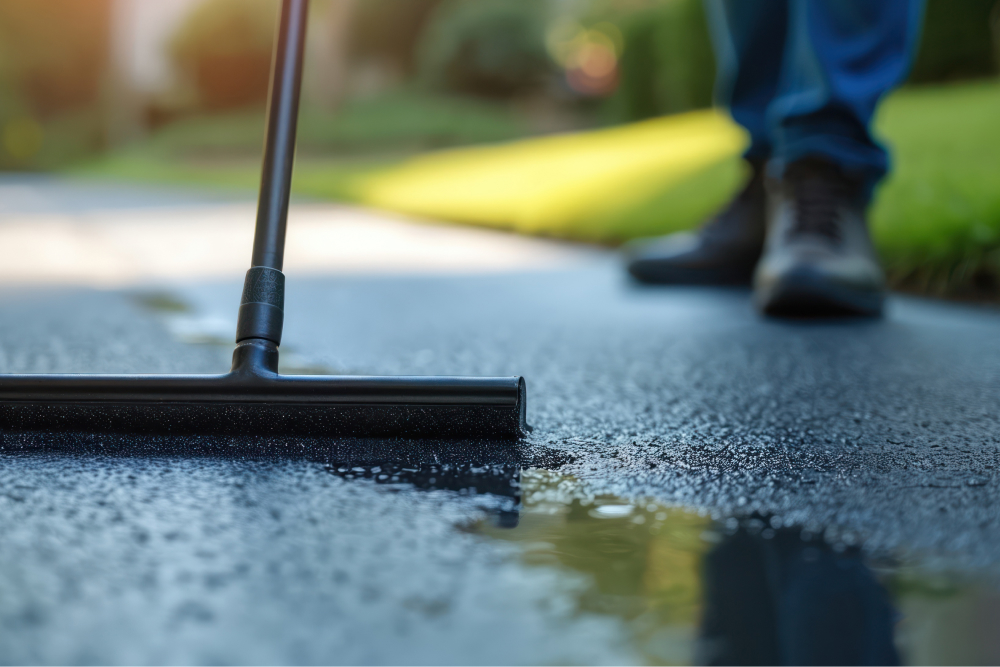
Sealcoating is one of the smartest things you can do for your asphalt surface. It protects against sun, rain, oil, and wear-and-tear, giving your pavement a fresh look and longer lifespan. When property owners search for asphalt sealcoating contractors near me, they’re often looking for routine maintenance to avoid expensive repairs later. Calvac Paving offers professional sealcoating services across San Jose, helping our clients get the most out of their pavement investment.

Residential Asphalt Contractors Near Me

Need a new driveway or some patchwork on your existing one? Finding trustworthy residential asphalt contractors near me can be a challenge, but we’re here to make it easy. Calvac Paving works with homeowners throughout the Bay Area, providing affordable and professional paving for driveways, private roads, and walkways. We’ll guide you through every step, from planning to cleanup, and make sure the final result is smooth, safe, and built to last.
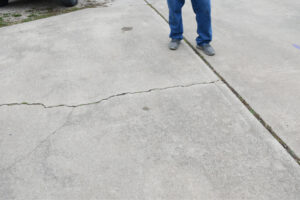
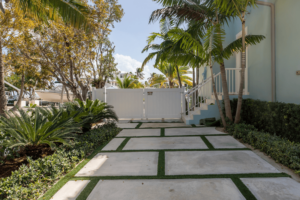
Commercial Asphalt Contractors Near Me

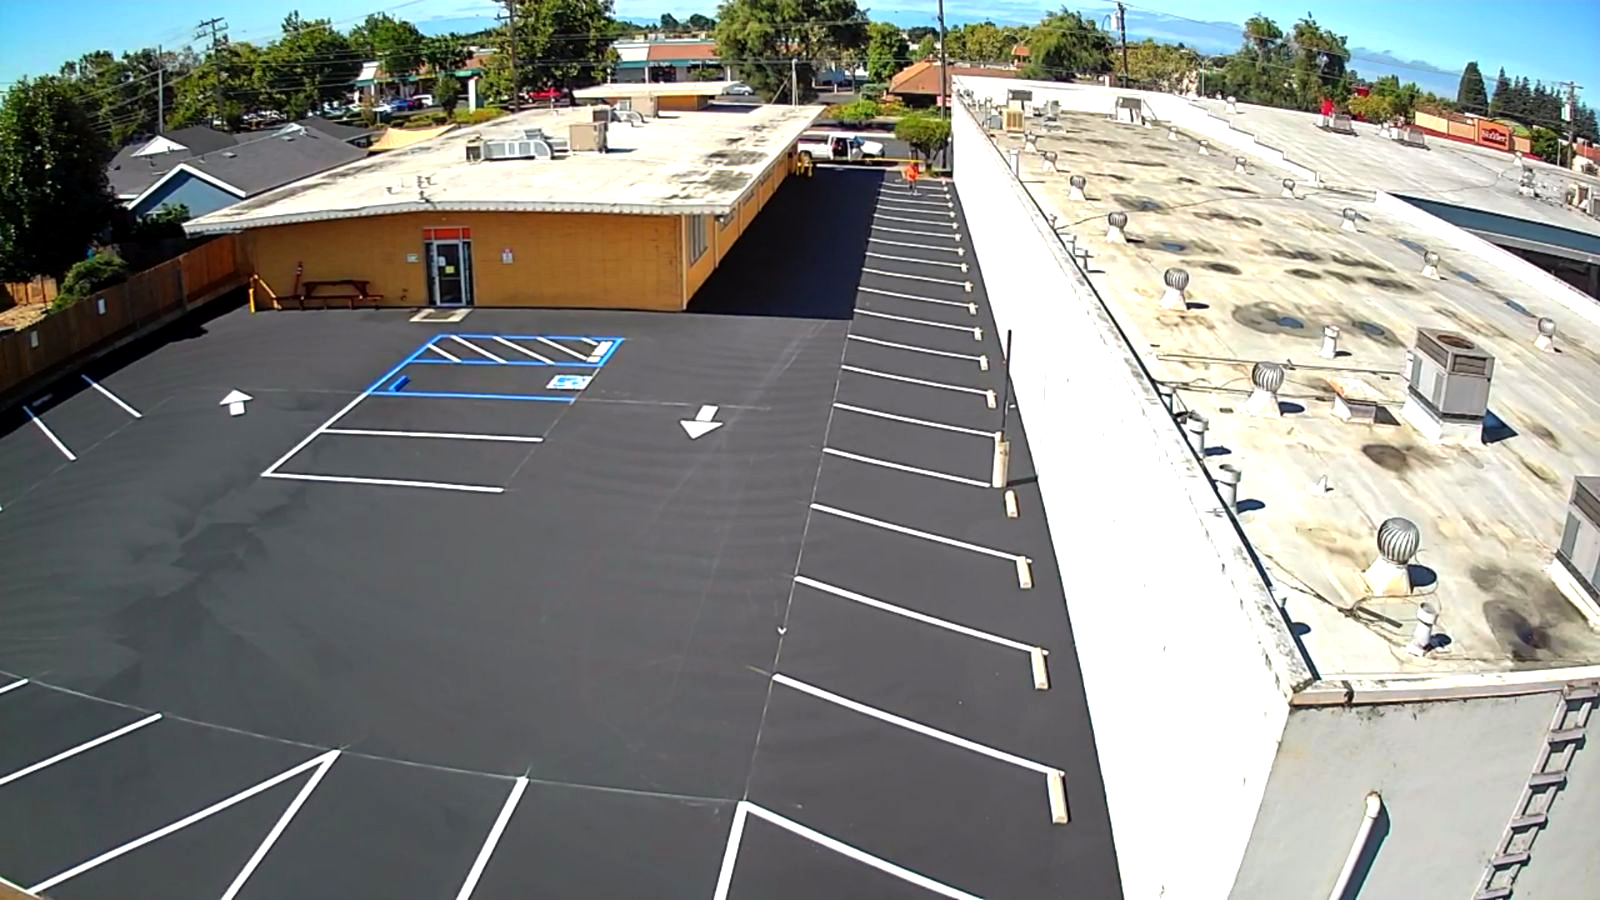
If you’re managing a shopping center, office park, warehouse, or any other type of commercial property, chances are you’ve searched for commercial asphalt contractors near me to find the right team for the job. Commercial paving comes with its own set of challenges—bigger spaces, heavier traffic, ADA requirements, and tight timelines.

At Calvac Paving, we specialize in commercial asphalt projects across San Jose and the Bay Area. We understand the importance of keeping your property safe, professional-looking, and fully functional for both customers and employees. From parking lots and loading zones to fire lanes and walkways, our experienced in-house crew can handle projects of any size, with minimal disruption to your day-to-day operations.

Asphalt Contractors Near Me: Why Local Matters More Than You Think

Asphalt Paving Contractors Near Me

When you search for asphalt paving contractors near me, you’re looking for a team that can handle everything—from grading and sub-base prep to the final compacted layer. Calvac Paving is a full-service paving company that takes pride in doing every step right. Whether it’s a parking lot, industrial yard, or residential street, we have the experience and equipment to deliver a strong, clean surface every time.

What Services Should You Expect from a Local Asphalt Contractor?

When you’re looking for asphalt paving in San Jose, it’s important to find a contractor that does more than just lay blacktop. Here’s what a full-service paving company should offer:

Asphalt Installation

From new driveways to large commercial parking lots, your contractor should handle grading, base work, and paving with precision.

Asphalt Repair & Maintenance

Look for services like patching, crack sealing, and pothole repair to keep your pavement strong and safe.

Sealcoating

A protective layer that keeps your asphalt looking fresh and protects it from water, sun, and oil damage.

Line Striping & ADA Compliance

Professional line striping keeps your lot looking sharp and compliant with California’s ADA requirements.

Concrete Services

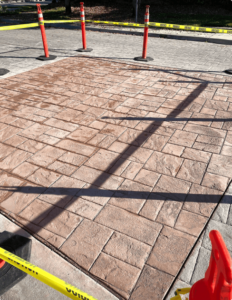
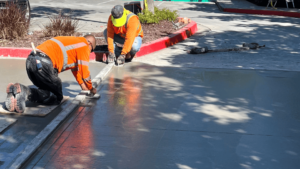
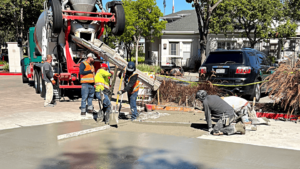
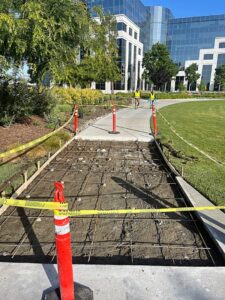
Many top paving companies also offer curbs, gutters, sidewalks, and ramps—just like we do at Calvac.

Asphalt Contractors Near Me: Why Local Matters More Than You Think

Local Knowledge = Longer-Lasting Results

Pavement isn’t just about pouring hot mix and smoothing it out. A local contractor understands:

  • When to pave (summer is great, but spring/fall can work too)

  • What materials to use based on local traffic and climate

  • How to grade and slope so water runs off correctly (and doesn’t eat away at the base)

  • Local codes and permitting in San Jose and surrounding areas

National chains or out-of-town companies might not catch these details—and those small things can lead to big problems later.

How Calvac Paving Compares to Other Asphalt Contractors in San Jose

We looked at what some of our competitors offer—like We Love Paving, DRYCO, Black Diamond, and American Asphalt. They’re solid companies. But here’s how Calvac stands out:

FeatureCalvac Paving ✅Most Competitors ❌
In-House Crews 👷‍♂️YesOften Outsourced
50+ Years Experience 📆Since 1974Less Than 30 Years
San Jose Focus 📍YesBroad or Regional
Custom Solutions 🛠️Tailored to SitePackage-Based
Long-Term Relationships 🤝YesOften One-Off Jobs

When you choose us, you’re getting local experience backed by decades of results—and a crew that actually cares about doing things right.

Real Projects. Real Results.

From HOAs in Santa Clara to commercial centers in San Jose, we’ve handled everything from small repairs to full-scale asphalt installations. We don’t just show up, do the job, and disappear—we build relationships and take pride in our work sticking around for years.

Tips for Hiring the Right Asphalt Contractor Near You

  1. Check their license and insurance – A good contractor will be happy to show it.

  2. Ask for local references – If they’ve worked in your area, they’ll have happy customers nearby.

  3. Review their services – Make sure they handle everything you need (not just paving).

  4. Look at photos of past work – A picture’s worth a thousand reviews.

  5. Get a detailed quote – Pricing should be transparent and easy to understand.

FAQs About Asphalt Contractors

How do I find the best asphalt contractor near me?

Look for local experience, in-house crews, and a wide range of services. Reading Google reviews and checking out their work in your neighborhood helps too.

How much does asphalt paving cost?

Costs vary based on project size, location, and condition of the existing surface. We’re happy to provide a free estimate.

How long does asphalt last?

Well-installed and maintained asphalt can last 15–30 years, depending on traffic, weather, and how often it’s sealed.

How often should asphalt be sealed?

We recommend every 3–5 years for most properties, though high-traffic areas might need more frequent maintenance.

What makes Calvac different from other asphalt companies?

We’ve been serving San Jose for over 50 years, use only in-house crews, and treat every job with the attention it deserves. Our work is built to last, not to be redone.

Asphalt Contractors Near Me: Why Local Matters More Than You Think

FAQs About Calvac Paving

Where is Calvac Paving based?

We’re proudly based in San Jose, CA, and serve Santa Clara County and the surrounding Bay Area.

Do you handle both residential and commercial paving?

Yes—we work with HOAs, schools, retail centers, apartment complexes, and homeowners across the Bay Area.

Do you offer free estimates?

Absolutely. Just contact us and we’ll set up a time to walk the site and provide a clear, no-pressure quote.

What kind of projects do you specialize in?

We’re known for parking lots, ADA upgrades, concrete flatwork, driveway paving, and pavement maintenance plans.

Get a Free Estimate from Calvac Paving Today

When it comes to finding asphalt contractors near me, trust the team that’s been doing it right for over 50 years. Whether you’re a property manager, business owner, or homeowner, Calvac Paving is here to deliver top-quality asphalt and concrete solutions in San Jose and beyond.

Request Your Free Estimate Now

Get more Bay Area concrete paving tips below:


How Asphalt Is Laid – Step-by-Step by Calvac Paving

How Asphalt Is Laid – Step-by-Step

From start to finish, here’s what really goes into laying asphalt—explained simply by the Bay Area paving pros at Calvac Paving.

Facebook
LinkedIn
Twitter
Pinterest
How Asphalt Is Laid

If you’ve ever wondered how asphalt is laid, you’re not alone. Whether you’re thinking about paving your driveway or curious about how large commercial parking lots come together, it helps to understand what goes into a long-lasting asphalt surface.

In this guide, we’ll walk you through each step of the asphalt paving process—from the first swing of the excavator to the final roll. We’ll also answer some common questions about asphalt and give you tips to keep it looking fresh for years.


How Asphalt Is Made

Before we get into how asphalt is laid, let’s talk briefly about what it is. Asphalt is made from a mixture of crushed stone, gravel, sand, and bitumen (a sticky black substance made from crude oil). It’s heated up and mixed until it becomes a hot, sticky material that can be shaped and compacted.


How Asphalt Is Produced

Asphalt is produced in a special plant that combines the raw materials at high temperatures. Once it’s mixed, the hot asphalt is transported to the job site in insulated trucks to keep it warm and workable. Timing is key—if the mix cools too fast, it can’t be spread or compacted properly.


How Asphalt Is Laid

Asphalt Paving: The Process of Laying Asphalt

Laying asphalt isn’t as simple as pouring it on the ground and flattening it out. It’s a detailed process that follows a step-by-step method to make sure the surface is solid, smooth, and built to last.

Let’s break it down into 7 main steps—based on the paving processes outlined by Wolf Paving, Superior Asphalt, and Bituminous Roadways.


Step 1: Demolition and Removal

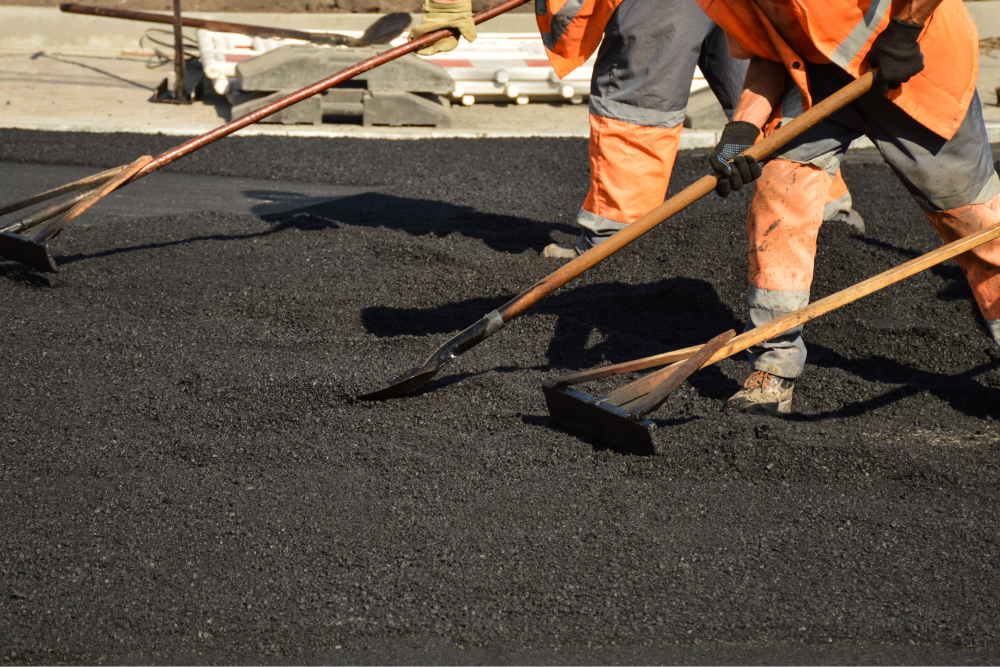
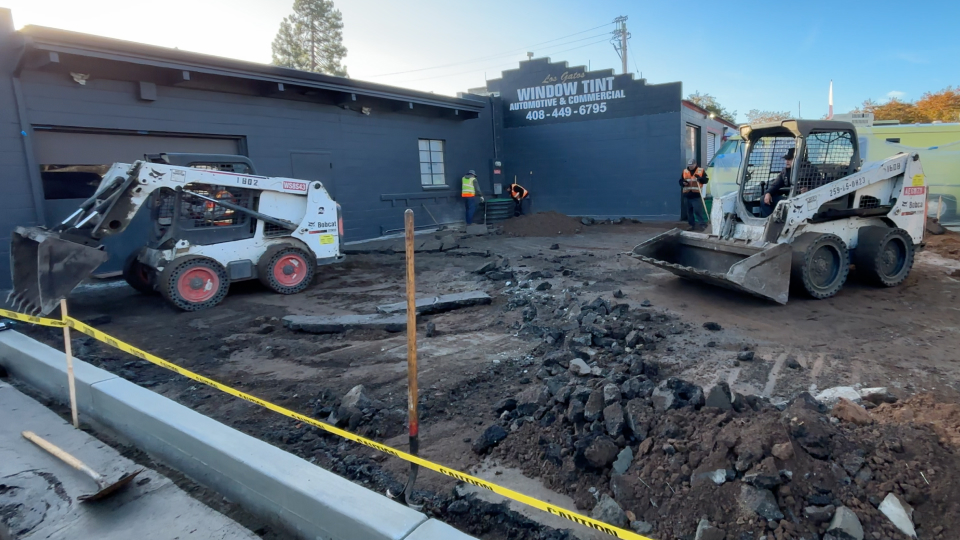
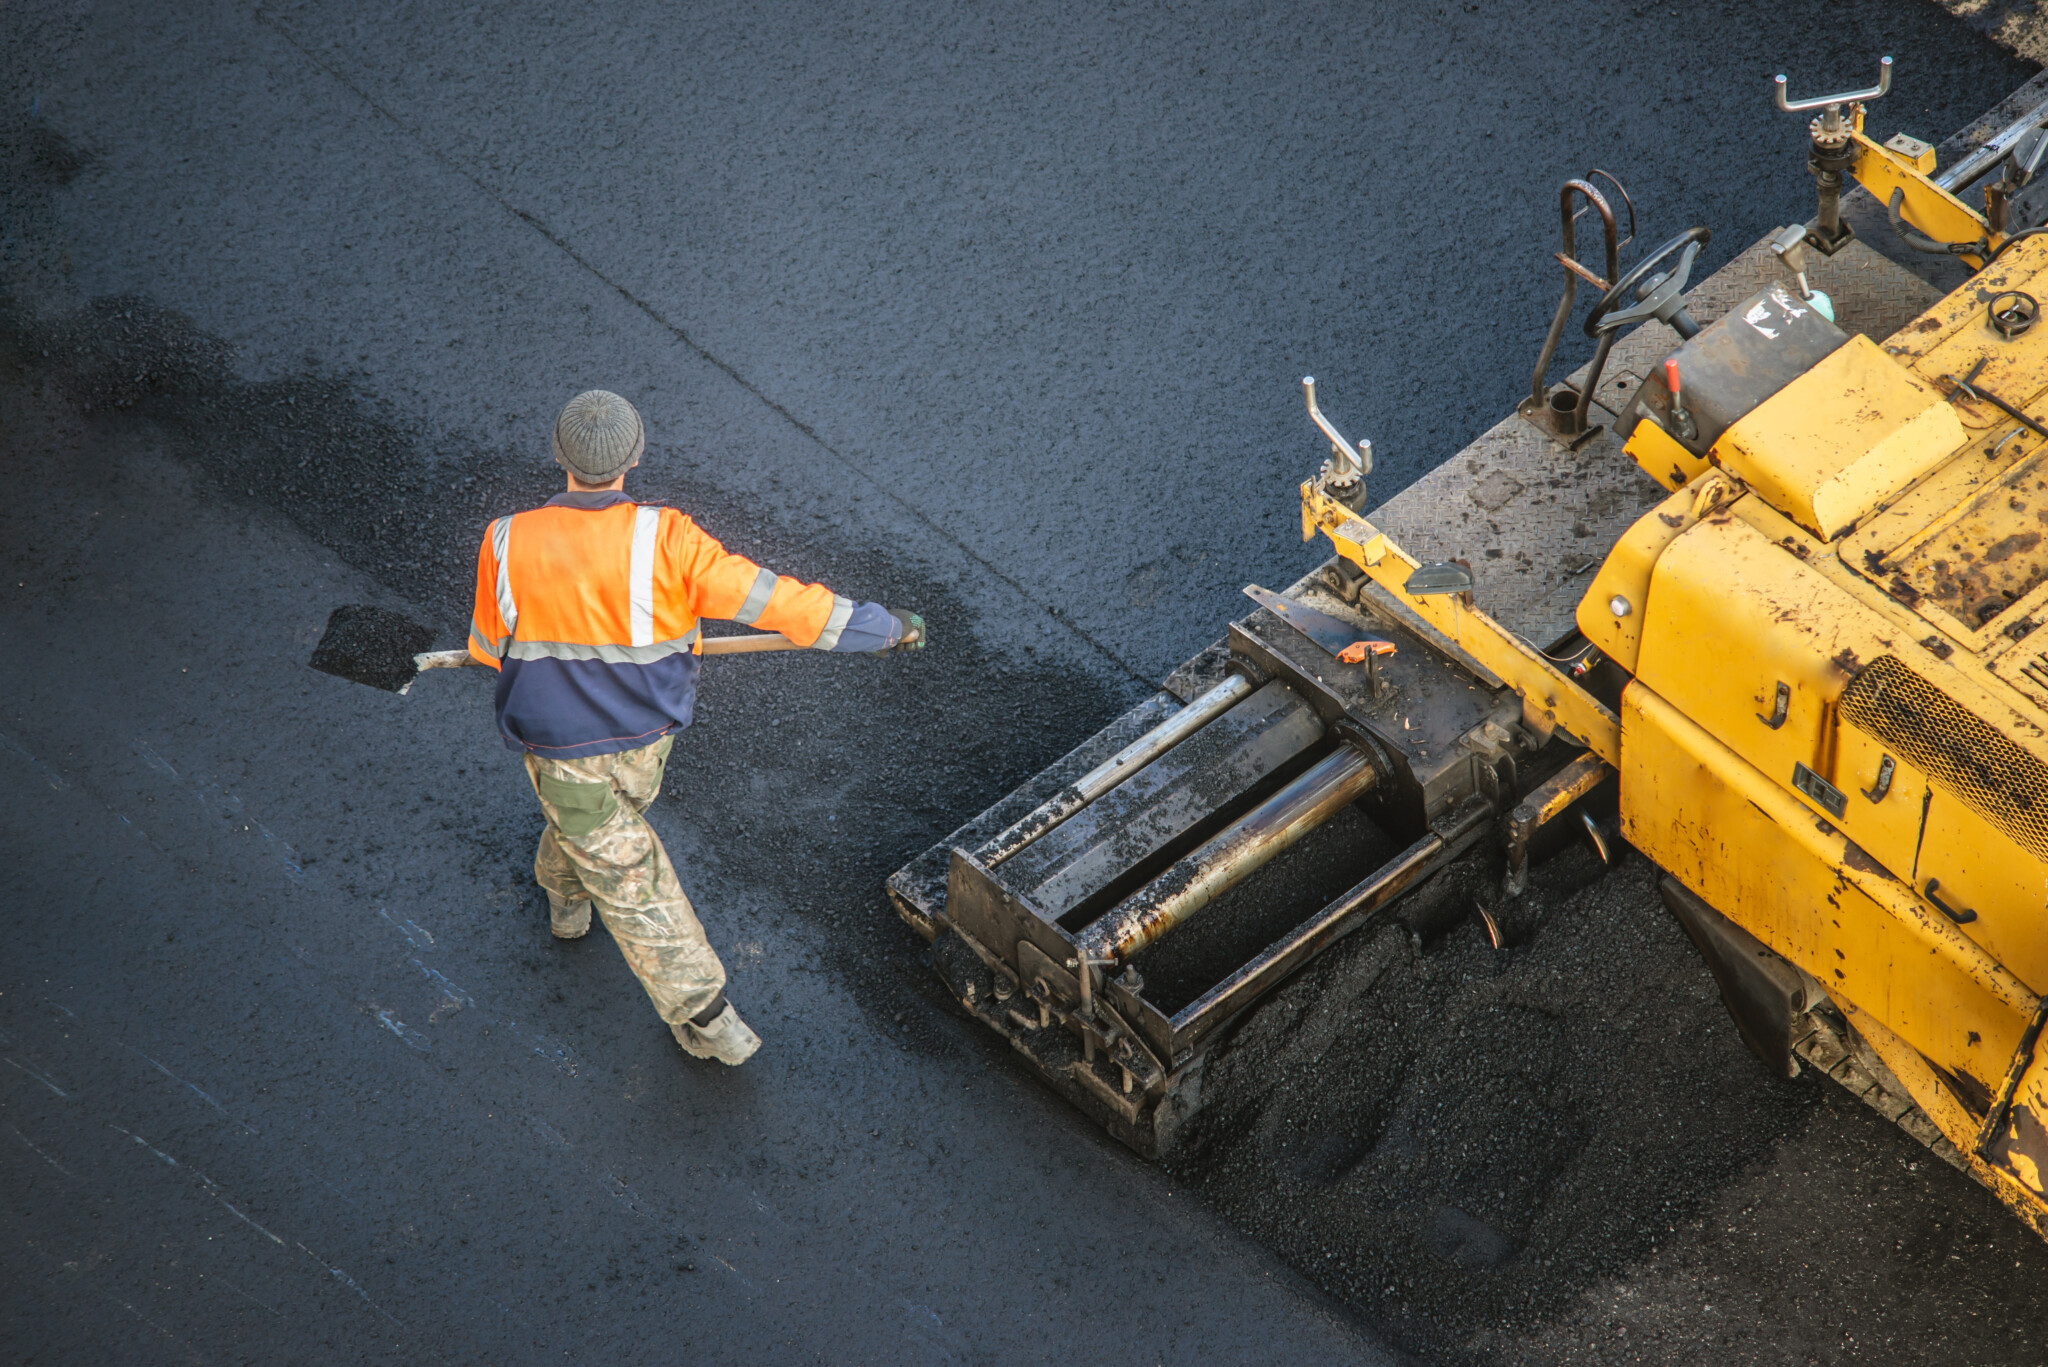
We start by removing the existing surface—whether it’s old asphalt, concrete, or gravel. Using heavy equipment like excavators and bobcats, we tear out the old material and haul it off the site. Sometimes the recycled asphalt can be reused later.


Step 2: Grading and Sloping

Once the surface is cleared, we level and grade the area. Proper grading makes sure water drains off the pavement instead of pooling and causing damage. We also slope the surface slightly so rainwater flows toward drains or landscaping areas.


Step 3: Prepare the Sub Base

The sub-base is the layer beneath the asphalt. Think of it as the foundation of your pavement. We build it using compacted aggregate like crushed stone. A strong sub-base supports the asphalt and helps prevent cracks and shifting over time.


How Asphalt Is Laid

Step 4: Proof Roll, Undercutting, and Sub-Base Repair

Before we move on, we do a proof roll—a test where we drive a heavy truck across the sub-base to see if it holds up. If we find any soft spots, we cut them out and repair them. This ensures the pavement won’t settle or fail prematurely.


Step 5: Binder and Surface Course

Now it’s time to lay the binder layer—a strong mix of large aggregate and bitumen that creates a sturdy middle layer. It adds durability and structure, kind of like the bones of the road.


Step 6: Install New Asphalt Surface

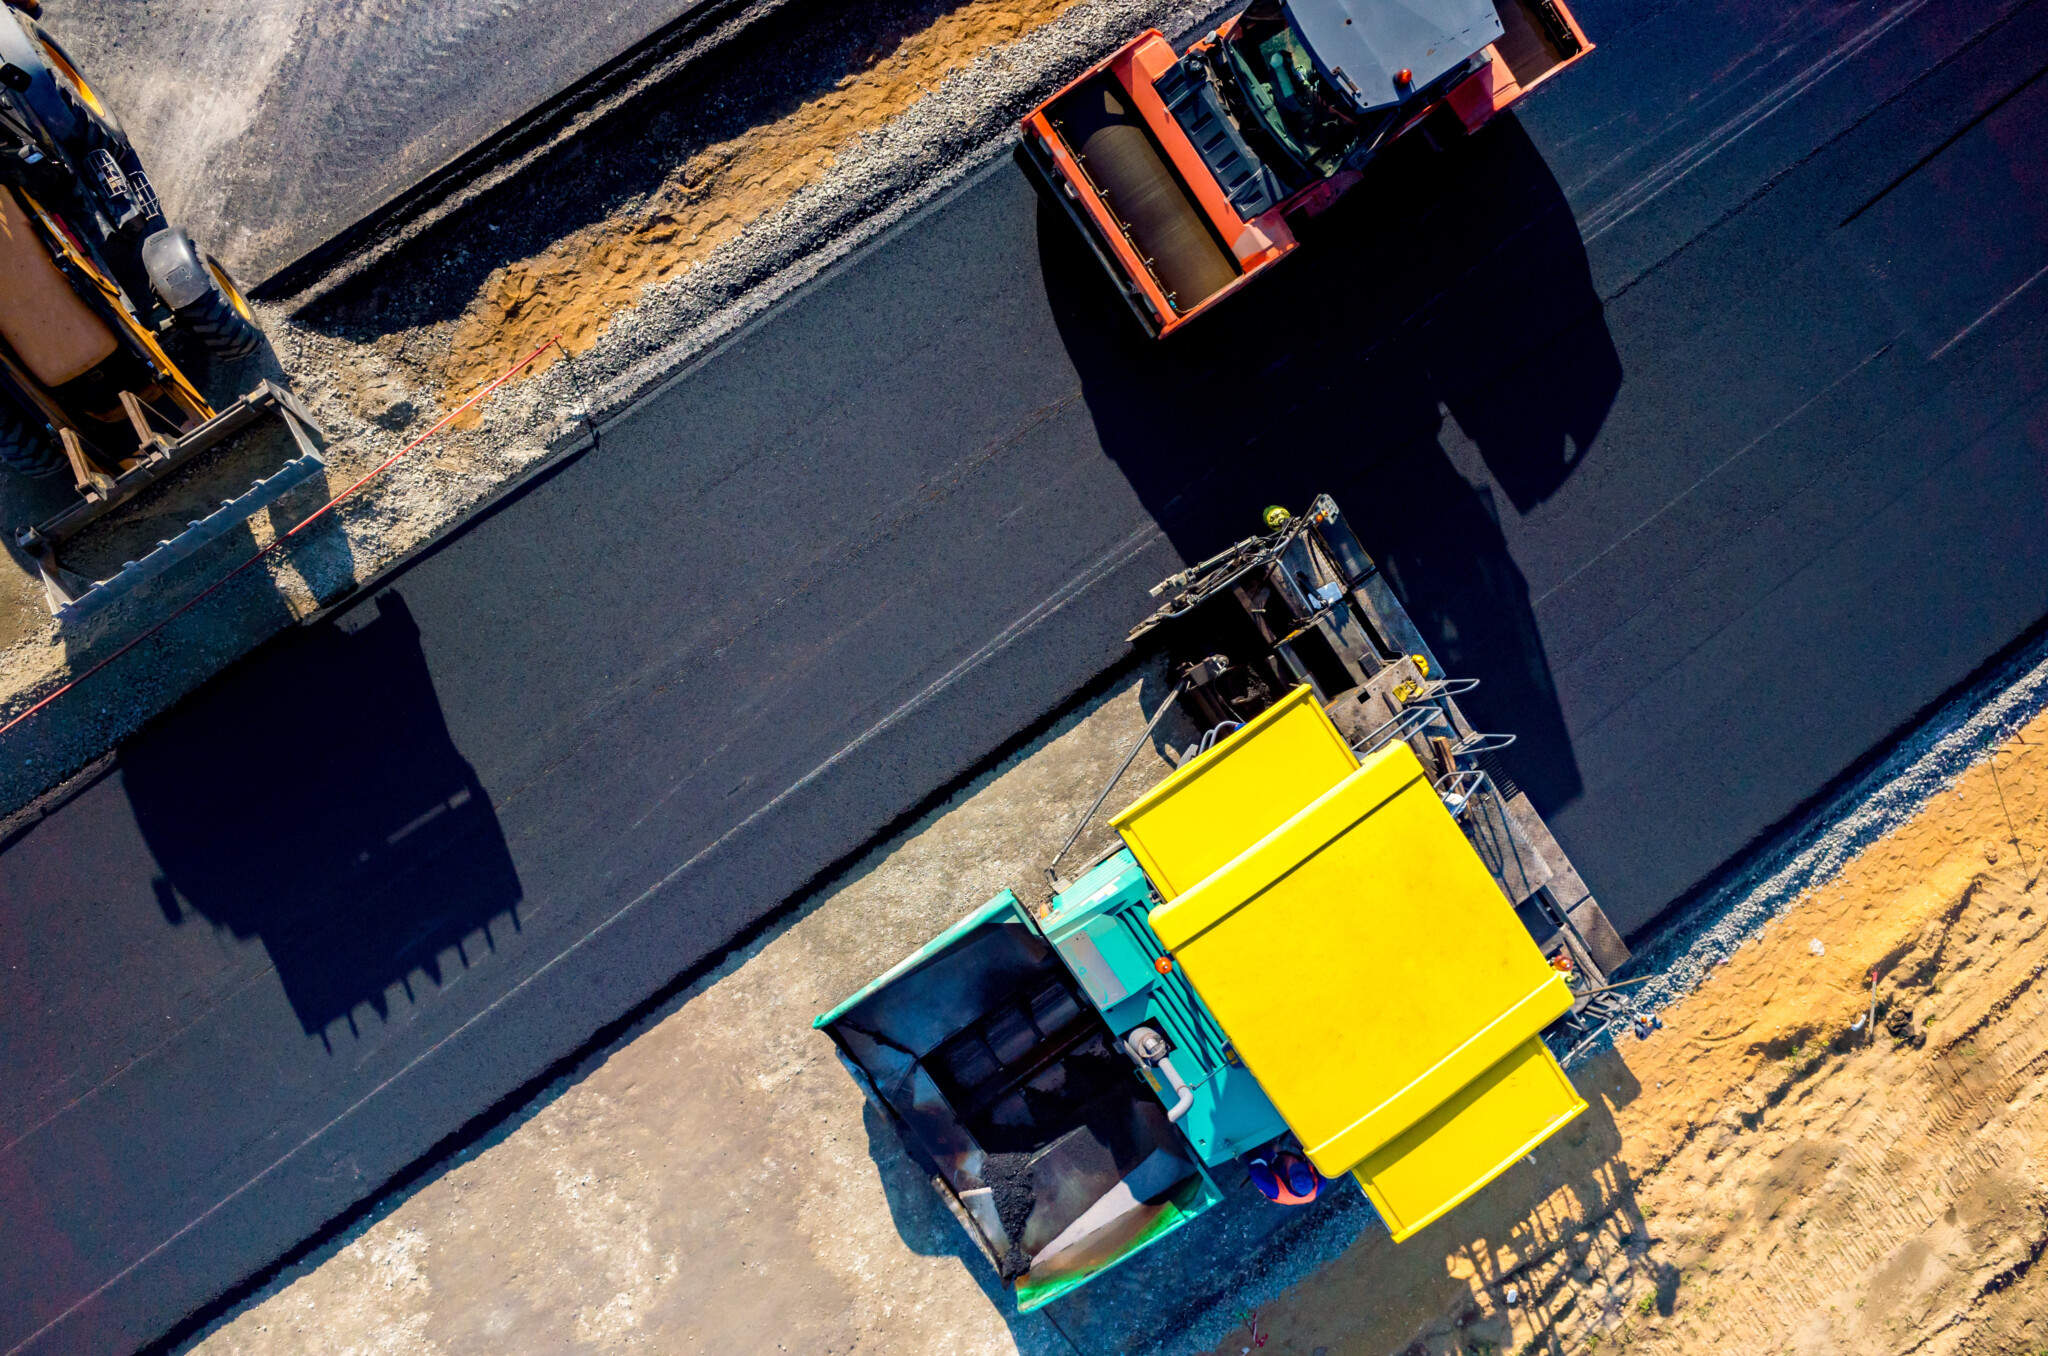
On top of the binder, we install the surface layer, made with smaller aggregate for a smooth, finished look. This is the part you see and drive on, so we make sure it’s laid evenly and compacted properly for a clean, professional result.


Step 7: Butt Joints and Transitions

If the new pavement connects to existing surfaces like sidewalks or driveways, we create butt joints. These make sure the transition is smooth so there’s no bump or lip between old and new pavement.


To Complete the Project: Final Roll

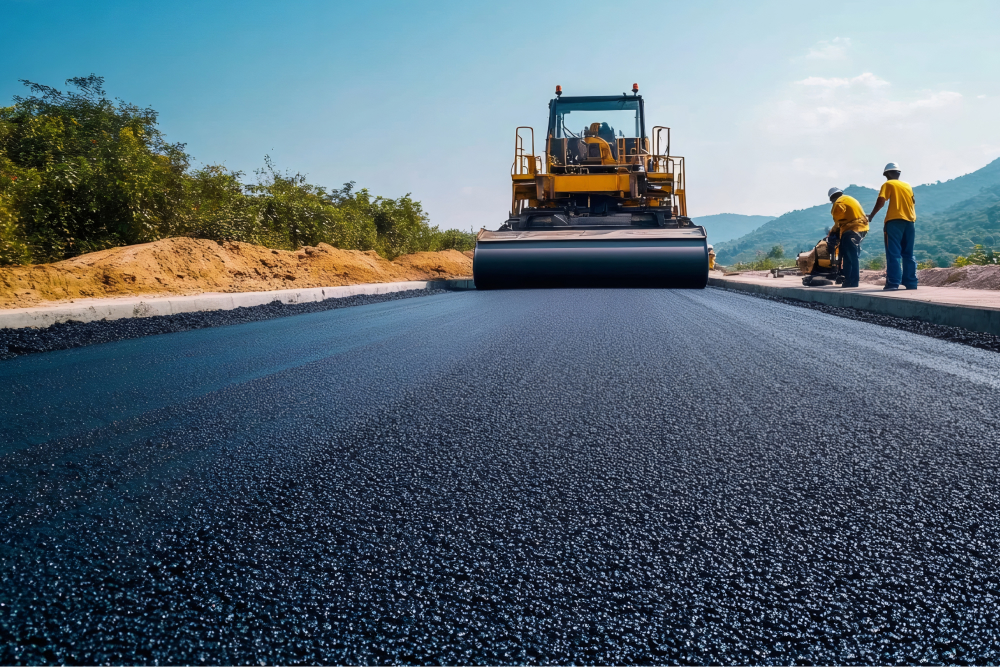
Lastly, we use a roller to go over the entire surface one final time. This step locks everything into place, removes any air pockets, and creates that tight, compact finish that asphalt is known for.


Maintenance Tips for Newly Laid Asphalt

To get the most out of your new asphalt surface:

  • Avoid driving on it for 24–48 hours after installation.

  • Don’t park heavy vehicles in the same spot during the first week.

  • Sealcoat every 3–5 years to protect against UV rays, water, and oil.

  • Sweep regularly to prevent debris buildup and stains.

  • Repair cracks early to prevent bigger problems down the line.


FAQs About How Asphalt Is Laid

How long does it take to lay asphalt?

Most residential driveways can be done in a day. Larger commercial projects may take several days depending on the size and complexity.

How thick should asphalt be?

For residential driveways, 2–3 inches is common. For commercial lots or streets, 4–6 inches or more may be needed.

When is the best time of year to lay asphalt?

Spring through early fall is ideal, when temperatures are warm enough to keep the asphalt mix workable.

How soon can I drive on new asphalt?

You can usually drive on it after 24–48 hours, but it’s best to wait 3–5 days before parking anything heavy on it.


FAQs About Calvac Paving

Who is Calvac Paving?

We’re a trusted asphalt and concrete paving company based in San Jose, California. We’ve been serving the Bay Area for over 50 years.

Do you do residential and commercial paving?

Yes! We handle everything from home driveways to large commercial lots, schools, and industrial yards.

Do you offer free estimates?

Absolutely. Just contact us and we’ll schedule a time to check out your project and provide a free quote.

What areas do you serve?

We proudly serve San Jose, Santa Clara County, and the greater Bay Area. If you’re not sure if you’re in our service area, just ask!


Ready to Get Started?

If you’re planning a new paving project and want it done right from start to finish, give us a call. At Calvac Paving, we bring decades of experience, reliable crews, and top-quality work to every job.

👉 Request a Free Estimate Now

Get more Bay Area concrete paving tips below:


Parking Lot Striping: Everything You Need To Know

Parking Lot Striping: Everything You Need To Know

Facebook
LinkedIn
Twitter
Pinterest
parking lot striping

Why Parking Lot Striping Matters

A well-striped parking lot is more than just a nice touch—it plays a big role in keeping your property safe, organized, and looking sharp. Whether you’re managing a shopping center, office complex, or apartment building, clear striping ensures smooth traffic flow, maximizes parking space, and keeps your lot compliant with accessibility laws.

At Calvac Paving, we’ve been helping businesses in the Bay Area with high-quality parking lot striping for decades. In this guide, we’ll cover everything you need to know about parking lot striping, including paint types, best practices, costs, and maintenance tips.

What Is Parking Lot Striping?

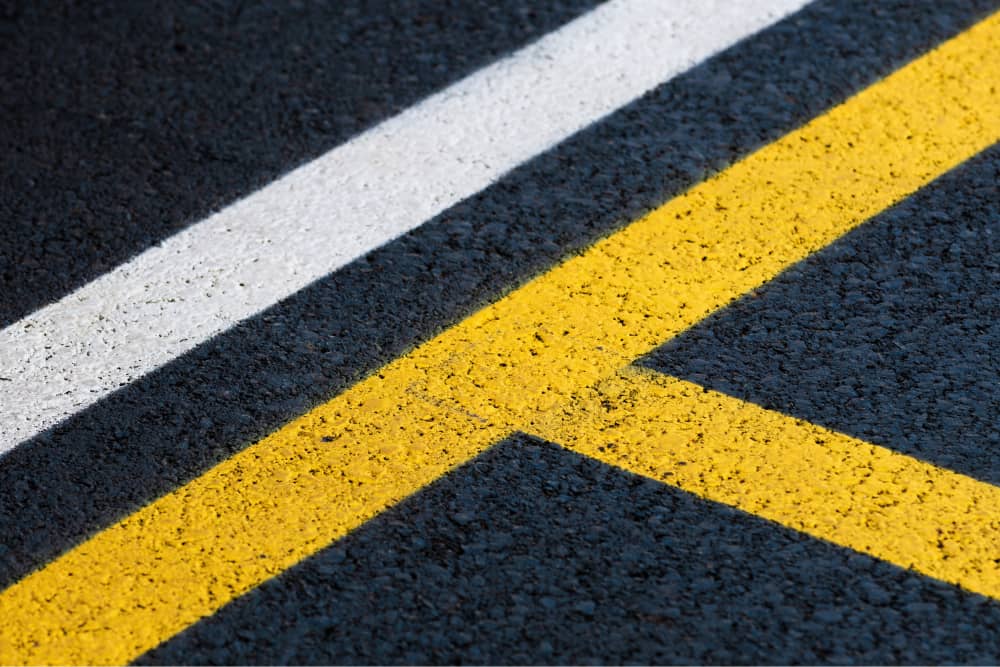
Parking lot striping (also called pavement marking) involves painting lines and symbols on asphalt or concrete to indicate parking spaces, directional arrows, crosswalks, and other important traffic guidelines. It may also include the installation of wheel stops and safety bollards.

Professional striping companies use specialized equipment like laser-guided striping machines and reflective bead dispensers to ensure precise, long-lasting results.

parking lot striping San Jose

Why Is Parking Lot Striping Important?

A fresh, well-marked parking lot has several key benefits:

1. Improves Safety

Clear striping reduces confusion and minimizes the risk of accidents. Well-defined parking spots and pedestrian walkways help prevent collisions between vehicles and pedestrians.

2. Maximizes Parking Space

Properly marked parking spaces ensure you’re using your lot efficiently, allowing for the maximum number of vehicles to park comfortably.

3. Enhances Curb Appeal

A clean, clearly marked parking lot gives customers and tenants a positive first impression. Faded lines can make a business look neglected, while fresh striping adds to the overall appeal of your property.

4. Ensures ADA Compliance

The Americans with Disabilities Act (ADA) requires parking lots to include designated accessible parking spaces with proper signage and dimensions. Staying compliant helps you avoid fines and ensures accessibility for all visitors.

5. Reduces Liability

Well-maintained striping helps prevent accidents, reducing the risk of potential lawsuits if someone gets injured due to unclear markings or improper signage.

Types of Paint Used for Parking Lot Striping

There are three main types of paint used for parking lot striping, each with its pros and cons:

1. Oil/Solvent-Based Paint

  • Pros: Highly durable, resistant to freezing temperatures, ideal for colder climates.

  • Cons: Takes longer to dry, contains more chemicals, and has environmental restrictions in some areas.

2. Water-Based Paint

  • Pros: Dries quickly (often within 15 minutes), environmentally friendly, cost-effective.

  • Cons: Less durable than oil-based paints, may require more frequent restriping.

3. Thermoplastic Paint

  • Pros: Extremely durable, long-lasting, ideal for high-traffic areas.

  • Cons: More expensive than other options, requires specialized application.

Choosing the right paint depends on factors like climate, budget, and expected traffic levels. At Calvac Paving, we help clients select the best option for their needs.

parking lot striping

How Often Should You Restripe Your Parking Lot?

Over time, parking lot striping fades due to sun exposure, heavy traffic, and weather conditions. Here’s a general guideline on when to restripe:

  • Every 1-2 years for high-traffic lots.

  • Every 2-4 years for lower-traffic areas.

  • As soon as markings become difficult to see, regardless of the timeframe.

Regular maintenance keeps your parking lot safe, professional-looking, and compliant with local regulations.

What Affects the Cost of Parking Lot Striping?

Several factors impact the cost of restriping or new striping, including:

  • Size of the parking lot – Larger lots require more paint and labor.

  • Type of paint used – Oil-based, water-based, and thermoplastic have different price points.

  • Additional markings – Crosswalks, arrows, ADA spaces, and fire lanes add to the cost.

  • Existing condition of the lot – Cracked or worn pavement may require repairs before striping.

Typical costs range from $0.20 – $0.30 per linear foot for standard 4-inch lines, with extra charges for specialty markings like directional arrows and handicap symbols.

Best Practices for Parking Lot Striping

1. Plan Before You Paint

Before striping, create a layout that maximizes space while maintaining proper traffic flow and accessibility compliance.

2. Use High-Quality Paint

Investing in durable, long-lasting paint saves money in the long run by reducing the need for frequent restriping.

3. Apply Paint in Optimal Conditions

Paint adheres best when temperatures are above 50°F and there’s no rain in the forecast.

4. Maintain Your Lot Regularly

Sealcoating, cleaning, and minor repairs help prolong the life of your striping and keep your parking lot looking sharp.

FAQs About Parking Lot Striping

How long does it take for parking lot paint to dry?

Most striping paint dries within 30 minutes to an hour, but it’s best to keep traffic off freshly painted areas for a few hours.

Do I need to close my business during striping?

Not necessarily. Striping can be done in sections, during off-hours, or on weekends to minimize disruptions.

Can I paint my parking lot myself?

While DIY striping kits exist, professional striping ensures accurate measurements, durable paint application, and compliance with ADA and local regulations.

What happens if my parking lot isn’t ADA compliant?

Non-compliant parking lots may face fines or lawsuits. Ensuring your lot meets ADA guidelines protects your business and accommodates all visitors.

FAQs About Calvac Paving

How long has Calvac Paving been in business?

Calvac Paving has been serving the Bay Area for over 50 years, providing expert asphalt, concrete, and striping services.

Do you provide free estimates?

Yes! We offer free, no-obligation quotes for parking lot striping and other paving services.

What areas do you serve?

We provide asphalt and concrete services throughout San Jose and the surrounding Bay Area.

Can you handle large-scale commercial projects?

Absolutely! Our team specializes in commercial and industrial paving projects, from small parking lots to large retail centers.

Conclusion

Parking lot striping is essential for safety, efficiency, and curb appeal. Whether you need new striping or a fresh coat to brighten up faded markings, Calvac Paving has the experience and expertise to get the job done right.

Need a quote? Contact us today to schedule a free consultation and keep your parking lot in top shape!

Get more Bay Area concrete paving tips below:


How to Repair Driveway Concrete

How to Repair Driveway Concrete

Facebook
LinkedIn
Twitter
Pinterest
repair driveway concrete

Driveway Concrete: What to Know Before Getting Started

Driveway concrete: A cracked or damaged concrete driveway can be an eyesore, but the good news is—you don’t always have to replace the whole thing. With the right materials and techniques, you can repair your concrete driveway yourself and extend its lifespan. In this guide, we’ll break down everything you need to know about how to repair concrete driveway step by step.

Concrete vs. Asphalt Driveways

Before diving into repairs, let’s compare concrete and asphalt driveways. Concrete driveways are durable, long-lasting, and require less maintenance than asphalt. However, they can crack over time due to weather conditions, tree roots, and heavy vehicles. If you want a solid, low-maintenance solution, repairing a concrete driveway is worth the effort.

Concrete driveways also offer better heat reflectivity, making them a great option in warm climates. They don’t soften under high temperatures like asphalt, and they can be customized with different textures and finishes to enhance curb appeal.

Benefits of Having a Concrete Driveway

  • Longer lifespan compared to asphalt

  • Handles heavy loads better

  • Low maintenance requirements

  • More visually appealing

  • Environmentally friendly (reflects heat rather than absorbing it)

  • Can be customized with stamping, staining, or polishing

Signs You Need to Do Repair Work

How do you know when your driveway needs repairs? Look out for these signs:

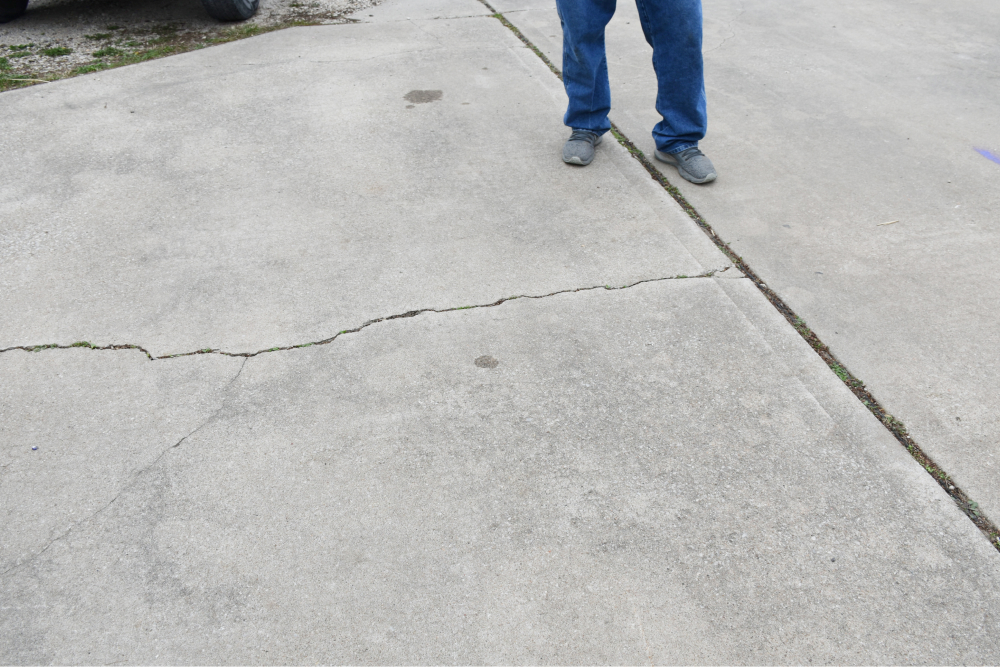
  • Cracks and Holes – Even small cracks can turn into bigger problems if left untreated.

  • Discoloration – This could be a sign of moisture damage.

  • Sunken Areas – Indicates foundation issues or soil shifting underneath.

  • Uneven Sloping – May cause drainage problems.

  • Water Pooling – Water collecting on the surface can lead to erosion.

  • Chipping and Spalling – Surface damage that could indicate deeper issues.

What Materials to Use for Repairs

Depending on the type of damage, you’ll need different materials:

  • Concrete patching compound (for small cracks and holes)

  • Mortar mix (for larger repairs)

  • Concrete bonding agent (to help new concrete stick to old surfaces)

  • Concrete sealer (to protect repairs from future damage)

  • Concrete lifting foam (for sunken slabs)

  • Wire brush and chisel (for cleaning cracks before repairs)

Key Factors to Consider Before Getting Started

  • Weather Conditions: Avoid repairing on rainy or freezing days.

  • Type of Damage: Small cracks require different treatment than sunken areas.

  • Curing Time: Some repairs take days to fully set.

  • Traffic Load: Heavier vehicles may require reinforced repairs.

  • Underlying Causes: Address tree roots or soil movement to prevent future cracks.

How to Repair Driveway Concrete

Step-by-Step Guide on How to Repair Driveway Concrete

1. Inspect the Damage

Before you start any repairs, take a close look at your driveway. Identify whether the damage consists of small cracks, large fractures, sunken areas, or tree root damage. This will help you choose the right repair method and materials.

If your driveway has extensive damage, you may need professional help. A simple patch won’t always be enough if the concrete is structurally compromised.

2. Clean the Area

A clean surface is crucial for effective repairs. Use a pressure washer to remove dirt, debris, and any loose concrete. A wire brush or a chisel can help dislodge stubborn pieces. Let the area dry completely before applying any repair materials.

Applying a concrete bonding agent after cleaning will ensure better adhesion for the repair materials.

3. Repair Small Cracks and Holes

Small cracks under 1/4 inch wide can be filled using a concrete patching compound. Simply apply the filler according to the product instructions and smooth it out with a putty knife. Allow sufficient drying time to ensure the filler bonds well with the surrounding concrete.

4. Repair Large Cracks

Larger cracks require more effort to fix. First, undercut the edges of the crack using a chisel to create a wider base for better adhesion. Apply a concrete bonding agent, then fill the crack with a mortar mix, smoothing the surface with a trowel. Let it cure fully before using the driveway.

5. Repair Sunken Sections

Sunken or uneven slabs are often caused by shifting soil beneath the concrete. One solution is using concrete lifting foam or mudjacking to raise the slab back into place. Alternatively, for severe cases, replacing the affected section may be the best option.

How to Repair Driveway Concrete Cracks

Cracks in concrete driveways can be repaired using patching compounds or mortar mix. Ensure the area is clean, apply a bonding agent, and fill the crack appropriately based on its size. Knowing how to repair concrete driveway properly can save you money and keep your driveway looking new.

For best results, apply a sealer over the repaired cracks to protect against future damage.

How Much Does Driveway Repair Cost

The cost of driveway repair depends on the severity of the damage. Small crack repairs can cost as little as $10-$50 for DIY solutions, while professional concrete lifting or slab replacement can range from $500 to $2,500, depending on the extent of the work required.

Concrete Driveway Repair: Get Started Today

Now that you know how to repair concrete driveway, take action before small cracks turn into costly damage. If the damage is beyond DIY repair, consider hiring professionals like Calvac Paving to ensure the job gets done right.

Concrete driveway repair is an investment that protects your home’s value and appearance. By keeping up with maintenance and acting quickly when you notice damage, you’ll keep your driveway in great condition for years to come.

How to Repair Driveway Concrete

Learn About About Calvac Paving: FAQs

What services does Calvac Paving offer?

Calvac Paving specializes in asphalt and concrete paving, repair, and maintenance services. They provide solutions for residential, commercial, and municipal projects.

Where is Calvac Paving located?

Calvac Paving is based in San Jose, California, and serves the surrounding areas, providing top-tier paving and repair solutions.

Does Calvac Paving handle both small and large projects?

Yes! Whether it’s a small driveway repair or a large commercial parking lot resurfacing, Calvac Paving has the expertise and equipment to handle projects of all sizes.

How can I request a quote from Calvac Paving?

You can visit Calvac Paving’s website and fill out their contact form, or give them a call to discuss your project and receive a customized quote.

How long has Calvac Paving been in business?

Calvac Paving has been serving the Bay Area for over 45 years, making them a trusted name in the paving industry.

What makes Calvac Paving different from other paving companies?

Calvac Paving stands out due to its commitment to quality, customer satisfaction, and long-term durability. They use high-quality materials and proven methods to ensure every project lasts for years to come.

Does Calvac Paving offer eco-friendly paving solutions?

Yes! Calvac Paving implements environmentally friendly practices, including sustainable materials and energy-efficient processes, to reduce their impact on the environment.

How soon can I use my driveway after Calvac Paving repairs it?

The drying and curing time for repairs depends on the materials used. Typically, you can walk on the driveway within 24 hours and drive on it within 48-72 hours. Your paving professional will provide exact guidelines for your specific repair.

Can Calvac Paving help with preventive maintenance for my driveway or parking lot?

Absolutely! They offer sealcoating, crack filling, and other maintenance services to keep your concrete driveway or asphalt pavement in excellent condition and extend its lifespan.


By choosing Calvac Paving, you’re partnering with a company that prioritizes quality and long-lasting results. If you’re in need of professional concrete or asphalt repair, reach out to them today!

Get more Bay Area concrete paving tips below:


ADA Requirements for Parking Lots: Ensuring Compliance in the Bay Area

ADA Requirements for Parking Lots: Ensuring Compliance in the Bay Area

Facebook
LinkedIn
Twitter
Pinterest
ADA requirements for parking lots

ADA requirements for parking lots: Ensuring compliance with the Americans with Disabilities Act (ADA) for parking lots is essential for businesses and property owners in California, particularly in the Bay Area. Adhering to these regulations not only fulfills legal obligations but also demonstrates a commitment to accessibility and inclusivity. As a leading paving company in San Jose, Calvac Paving is dedicated to providing expert guidance on ADA requirements for parking lots and Homeowners Association (HOA) regulations to ensure your parking facilities meet all necessary standards.

Understanding ADA Requirements for Parking Lots

The ADA requirements for parking lots set forth specific guidelines to ensure that parking facilities are accessible to individuals with disabilities. Key considerations include:

Number of Accessible Parking Spaces

The required number of accessible parking spaces is determined by the total number of parking spaces in the lot. For instance, for parking lots with up to 100 spaces, one accessible space is required for every 25 spaces. This means a lot with 60 spaces must have at least three accessible parking spaces. As the total number of spaces increases, the required number of accessible spaces adjusts accordingly. It is essential for property owners and business managers to review and update their parking lots periodically to remain compliant with these requirements.

Dimensions and Signage

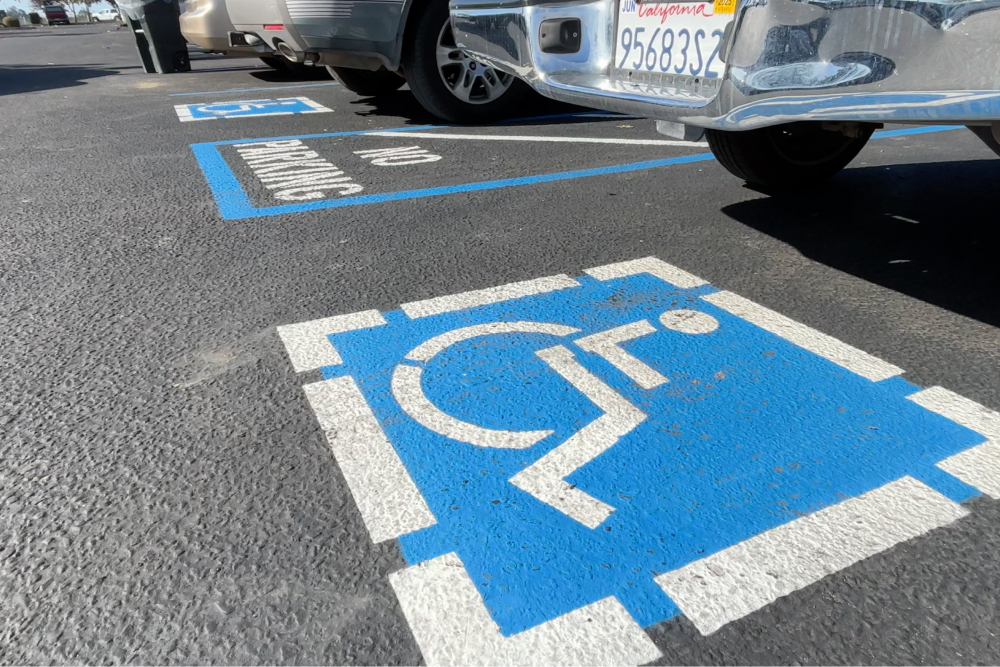
ADA requirements for parking lots specify that accessible parking spaces must be at least 96 inches wide, with an adjacent access aisle of at least 60 inches. Each space should be marked with the International Symbol of Accessibility and, where applicable, include a “van accessible” designation. Van-accessible spaces require a minimum vertical clearance of 98 inches to accommodate taller vehicles. Properly maintained signage is crucial to ensure compliance and avoid fines or penalties from local authorities.

Location and Accessible Routes

Accessible spaces should be located on the shortest accessible route to the building entrance. In facilities with multiple accessible entrances, accessible parking should be dispersed near each entrance. The route from the parking area to the entrance must be at least 3 feet wide, free of curbs or stairs, and have a firm, slip-resistant surface to comply with ADA requirements for parking lots. Ensuring these pathways are clear of obstructions and well-marked improves accessibility for all individuals, including those with mobility impairments.

ADA requirements for parking lots

HOA Requirements in California

Homeowners Associations (HOAs) in California have specific regulations that may impact parking lot design and usage. It’s crucial to align ADA compliance efforts with HOA requirements to ensure consistency and avoid potential conflicts.

Parking Allocation and Enforcement

HOAs often establish rules regarding parking allocations, including the designation of accessible spaces. These rules must comply with ADA requirements for parking lots and California laws. For example, the Davis-Stirling Common Interest Development Act provides a legal framework for HOAs, outlining guidelines on governance and homeowners’ rights, which can influence parking policies. It is advisable for HOAs to work with paving professionals to ensure their regulations align with both state and federal laws.

Rule Adoption and Amendments

HOAs have the authority to adopt and amend rules concerning common areas, including parking lots. Any changes to accessible parking regulations must align with both ADA requirements for parking lots and California accessibility laws. Regular updates to parking rules and regulations ensure that the community remains compliant and avoids legal complications.

Maintenance and Compliance

HOAs are responsible for maintaining common areas, including ensuring accessible parking spaces remain compliant. This includes keeping markings visible, repairing pavement issues, and addressing any barriers that may arise over time. HOA requirements must be followed to ensure long-term compliance with ADA requirements for parking lots. Additionally, routine inspections can help identify potential compliance issues before they become costly legal concerns.

ADA requirements for parking lots

Ensuring Compliance in San Jose and the Bay Area

Business owners and property managers in San Jose and the broader Bay Area must stay up to date with evolving ADA requirements for parking lots and HOA regulations. Compliance ensures accessibility for all individuals while avoiding costly penalties and legal challenges. Investing in compliance not only meets legal requirements but also enhances the reputation of a business or residential community.

Steps to Achieve Compliance

  1. Conduct an Accessibility Audit – Assess current parking facilities to identify any non-compliance issues related to ADA requirements for parking lots.

  2. Implement Required Adjustments – Ensure parking spaces, signage, and accessible routes meet current ADA requirements for parking lots standards.

  3. Work with Experts – Partnering with professionals like Calvac Paving ensures compliance with both ADA requirements for parking lots and HOA requirements.

  4. Ongoing Maintenance – Regularly inspect and maintain parking facilities to uphold compliance over time.

  5. Stay Informed on Regulations – Keep up with changes in federal and state ADA guidelines to ensure ongoing compliance.

At Calvac Paving, we specialize in ADA-compliant parking lot solutions for businesses, HOAs, and property owners in San Jose and throughout the Bay Area. Our team stays updated on the latest compliance regulations and provides expert guidance to ensure your parking facilities meet all necessary requirements. Contact us today to learn how we can help you improve accessibility and maintain a compliant and safe parking environment for all visitors and residents.

Get more Bay Area concrete paving tips below:


Accessible Parking Requirements for Bay Area Businesses

Accessible Parking Requirements for Bay Area Businesses

A Guide to Compliance and Best Practices

Facebook
LinkedIn
Twitter
Pinterest
Accessible Parking

Accessible Parking Requirements for Bay Area Businesses: As a business owner in the Bay Area, ensuring your property is accessible to all customers isn’t just good practice—it’s the law. Accessible parking spaces are a critical part of compliance with the Americans with Disabilities Act (ADA) and the California Building Code (CBC). Failing to meet these requirements can result in costly fines, lawsuits, and damage to your reputation.

In this guide, we’ll break down the accessible parking requirements for businesses in the Bay Area, explain how to calculate the number of spaces you need, and share tips for maintaining compliance. If you’re in San Jose or the greater Bay Area, partnering with a professional paving company like Calvac Paving can ensure your parking lot meets all legal and safety standards.


Why Accessible Parking Matters

Accessible parking spaces are essential for ensuring that individuals with disabilities can safely and conveniently access your business. In California, the Bay Area is known for its commitment to inclusivity, and businesses must reflect this by providing adequate parking accommodations.

Beyond legal compliance, accessible parking spaces demonstrate your business’s dedication to serving all members of the community. This can enhance your reputation and attract a wider customer base.


Accessible Parking Requirements in California

The number of accessible parking spaces your business needs depends on the total number of parking spaces in your lot. Here’s a quick breakdown:

  • 1–25 spaces: 1 accessible space

  • 26–50 spaces: 2 accessible spaces

  • 51–75 spaces: 3 accessible spaces

  • 76–100 spaces: 4 accessible spaces

  • 101–150 spaces: 5 accessible spaces

  • 151–200 spaces: 6 accessible spaces

  • 201–300 spaces: 7 accessible spaces

  • 301–400 spaces: 8 accessible spaces

  • 401–500 spaces: 9 accessible spaces

  • 501–1,000 spaces: 2% of total spaces

  • 1,001+ spaces: 20 accessible spaces + 1 for every 100 spaces over 1,000

Van-Accessible Spaces

At least 1 in every 6 accessible spaces must be van-accessible. These spaces require:

  • A minimum width of 8 feet for the access aisle.

  • A vertical clearance of 98 inches to accommodate wheelchair lifts.

ADA requirements for parking lots

Key Features of Compliant Accessible Parking Spaces

To meet ADA and CBC standards, your accessible parking spaces must include:

  1. Proper Signage: Clearly marked with the International Symbol of Accessibility.

  2. Access Aisles: A 5-foot-wide aisle for standard spaces and an 8-foot-wide aisle for van-accessible spaces.

  3. Location: Spaces must be located on the shortest accessible route to your business entrance.

  4. Slope: The parking area and access aisles must have a slope of no more than 2% to ensure safety and usability.


Common Mistakes to Avoid

Many businesses unknowingly violate accessible parking laws. Here are some common mistakes:

  • Insufficient Spaces: Not providing enough accessible spaces based on the total number of parking spots.

  • Improper Markings: Failing to properly mark accessible spaces and access aisles.

  • Obstructed Aisles: Allowing vehicles or objects to block access aisles.

  • Poor Maintenance: Cracks, potholes, or uneven surfaces in the parking lot can create hazards for individuals with disabilities.


How Calvac Paving in San Jose Can Help

If you’re a business owner in San Jose or the greater Bay Area, partnering with Calvac Paving is one of the best ways to ensure your parking lot meets all legal requirements. Here’s how Calvac Paving can assist:

  1. Parking Lot Design: Calvac Paving can help you design a parking lot that complies with ADA and CBC standards, including the correct number of accessible spaces and proper layout.

  2. Striping and Markings: Professional striping ensures your accessible spaces and access aisles are clearly marked and compliant.

  3. Slope and Drainage: Proper grading and drainage prevent water pooling and ensure a safe, accessible surface.

  4. Maintenance and Repairs: Regular maintenance, such as crack sealing and pothole repair, keeps your parking lot in top condition and reduces liability risks.


ADA parking lot requirements

Benefits of Working with Calvac Paving

  • Local Expertise: Calvac Paving understands the specific requirements and challenges of the Bay Area, including local ordinances and climate considerations.

  • Cost-Effective Solutions: Professional paving services can save you money in the long run by preventing costly fines and repairs.

  • Enhanced Curb Appeal: A well-maintained parking lot improves the overall appearance of your business and creates a positive first impression for customers.


Conclusion

Complying with accessible parking laws is not only a legal obligation but also a moral responsibility for Bay Area businesses. By understanding the requirements and working with Calvac Paving in San Jose, you can create a safe, accessible, and welcoming environment for all customers.

If you’re ready to upgrade your parking lot or need help ensuring compliance, contact Calvac Paving today. They’ll provide the expertise and services you need to meet ADA and CBC standards while enhancing the functionality and appearance of your property.


Get in Touch:
Hear from a paving expert! Fill out the form below to get started with Calvac Paving. Serving the entire Bay Area, we’re here to make your parking lot safe, accessible, and compliant with California laws. Call us at (408) 225-7700 or visit CalvacPaving.com to schedule a consultation!

Get more Bay Area concrete paving tips below:


Asphalt Parking Lots: The Ultimate Guide to Maintenance

Asphalt Parking Lots: The Ultimate Guide to Maintenance

Facebook
LinkedIn
Twitter
Pinterest
Asphalt Parking Lots

Asphalt parking lots are a crucial asset for businesses and property owners. It provides customers with a safe and reliable surface for parking while enhancing the property’s overall aesthetic and functionality. However, without proper maintenance, asphalt surfaces can deteriorate quickly, leading to expensive repairs and safety concerns. As a leading San Jose contractor, Calvac Paving is dedicated to helping businesses and property owners in the Bay Area extend the lifespan of their pavement and keep their asphalt parking lot in top condition.

Why Asphalt Parking Lots Deteriorate

Over time, even the best-laid asphalt parking lot surfaces begin to wear down due to several factors, including:

  1. Weather Conditions – The Bay Area experiences a variety of weather conditions, from heavy rains to high temperatures, which can cause asphalt to crack and degrade.

  2. Traffic Load – Frequent heavy traffic, including commercial vehicles, puts stress on the pavement, leading to premature wear.

  3. Water Damage – Water infiltrating cracks in the asphalt weakens the base layer, leading to potholes and structural failures.

  4. UV Radiation – Prolonged sun exposure oxidizes the asphalt, making it brittle and more susceptible to cracking.

  5. Poor Drainage – Improper drainage can cause standing water, leading to erosion and long-term damage.

Bad Asphalt Parking Lots

Essential Maintenance Tips for Your Asphalt Parking Lot

Proper maintenance can add years to the life of your asphalt parking lot, saving you thousands in repairs. Here are some key steps to keep your pavement in excellent condition:

1. Regular Sealcoating

Sealcoating acts as a protective barrier against the elements, shielding your asphalt parking lot from UV rays, water, and oil spills. As a trusted San Jose contractor, we recommend sealcoating every 2-3 years to maintain a smooth and resilient surface.

2. Crack Sealing

Even small cracks in your asphalt parking lot can lead to significant damage if left untreated. Water can seep into the cracks, weakening the base layer and leading to larger fissures. By sealing cracks early, you prevent costly repairs down the line.

3. Pothole Repairs

Potholes are not only unsightly but also a hazard for vehicles and pedestrians. Our Bay Area paving experts use high-quality materials to fill and repair potholes, ensuring a smooth surface that enhances safety and durability.

4. Proper Drainage Solutions

Water pooling on your asphalt parking lot is a sign of drainage issues that can cause long-term damage. As an experienced San Jose contractor, we assess and install effective drainage systems to redirect water away from your pavement.

5. Regular Sweeping and Cleaning

Dirt, debris, and oil spills can weaken asphalt over time. Implementing a regular cleaning routine helps maintain the integrity of your asphalt parking lot and prevents contaminants from seeping into the pavement.

Asphalt Parking Lots

The Benefits of Professional Maintenance

Hiring a professional San Jose contractor for your asphalt parking lot maintenance ensures that your pavement receives expert care. Some benefits include:

  • Cost Savings – Preventative maintenance reduces the need for expensive repairs.

  • Enhanced Curb Appeal – A well-maintained asphalt parking lot improves the overall appearance of your property.

  • Increased Safety – Smooth, crack-free surfaces minimize trip hazards and vehicle damage.

  • Extended Lifespan – Proper maintenance can extend the life of your asphalt pavement by 10-15 years.

When to Consider Asphalt Resurfacing

Sometimes, despite regular maintenance, an asphalt parking lot reaches a point where resurfacing is the best option. Signs that you may need resurfacing include:

  • Multiple deep cracks and widespread damage

  • Persistent potholes and uneven surfaces

  • Fading and loss of structural integrity

As a leading Bay Area paving company, Calvac Paving provides expert resurfacing solutions tailored to your needs. Our team evaluates the condition of your asphalt parking lot and recommends the most cost-effective solution.

Good Asphalt Parking Lot

Choosing the Right San Jose Contractor for Your Parking Lot

Selecting the right San Jose contractor for your asphalt parking lot project is crucial to achieving long-lasting results. Here are some factors to consider:

  1. Experience and Reputation – Look for a company with a proven track record of successful projects in the Bay Area.

  2. Quality Materials – High-quality asphalt and sealants ensure durability and longevity.

  3. Customer Service – A reliable contractor provides clear communication and outstanding service from start to finish.

  4. Competitive Pricing – Affordable pricing without compromising quality is essential.

At Calvac Paving, we pride ourselves on our commitment to excellence, using state-of-the-art equipment and industry best practices to deliver superior results for your asphalt parking lot.

Conclusion

Maintaining your asphalt parking lot is essential for safety, aesthetics, and long-term cost savings. With the right maintenance plan, professional sealcoating, crack sealing, and timely repairs, you can ensure your pavement lasts for decades. If you’re looking for a trusted San Jose contractor to help you maintain or resurface your asphalt parking lot, Calvac Paving is here to assist. Contact us today to learn more about our services and how we can keep your Bay Area property in pristine condition!

Get more Bay Area concrete paving tips below:


The Ultimate HOA Maintenance Guide for Asphalt and Concrete in San Jose and the Bay Area

Why HOA Maintenance Matters

The Ultimate HOA Maintenance Guide for Asphalt and Concrete in San Jose and the Bay Area

Facebook
LinkedIn
Twitter
Pinterest
HOA Maintenance

As a homeowners’ association (HOA) board member in San Jose and the greater Bay Area, you’ve got a lot on your plate—and keeping your community’s roads, parking lots, and sidewalks in good shape is one of the most critical responsibilities. When asphalt and concrete are maintained properly, they look great, last longer, and keep everyone safer. That’s why I’ve put together this straightforward guide to help you stay on top of your HOA maintenance tasks.

Why HOA Maintenance Matters

Safety Comes First

Cracks, potholes, and uneven surfaces aren’t just eyesores—they’re accidents waiting to happen. Whether it’s a resident tripping on an uneven sidewalk or a car bottoming out in a pothole, these issues can lead to costly liability claims. Addressing problems quickly keeps your community safe and reduces risk.

Keeping Your Neighborhood Looking Sharp

Nobody wants to live in a neighborhood where the roads are cracked and the sidewalks are stained. Well-maintained surfaces make your community more inviting and can even boost property values. When potential buyers visit, the first thing they notice is how well the community is cared for—and the condition of the pavement is a big part of that. HOA maintenance is key to ensuring your neighborhood stays attractive.

Saving Money Over the Long Haul

If you’ve ever put off a small repair and watched it turn into a big, expensive problem, you know why regular maintenance is so important. Fixing cracks and sealing surfaces regularly can prevent major damage and extend the lifespan of your asphalt and concrete. Trust me, a little proactive HOA maintenance goes a long way.

Challenges Specific to San Jose and the Bay Area

San Jose and the Bay Area have their own set of challenges when it comes to HOA maintenance and pavement care. Hot summers and cooler winters can cause asphalt and concrete to expand and contract, leading to cracks. Heavy use from residents, delivery trucks, and garbage trucks takes a toll on roads and parking lots. The Bay Area’s tree-lined streets are beautiful, but roots can wreak havoc on sidewalks and curbs. Poor drainage or standing water can weaken pavement over time, leading to bigger problems.

HOA Maintenance

How to Keep Asphalt in Great Shape

Inspect Regularly

Take a walk around your community at least twice a year to check for issues like cracks, potholes, faded markings, and oil stains. Catch these problems early, and you’ll save yourself a lot of headaches.

Seal Cracks ASAP

Cracks are the gateway to bigger problems. When water gets into those cracks and freezes, it expands, making the damage worse. Sealing cracks early stops the issue in its tracks. Regular crack sealing is a cornerstone of effective HOA maintenance.

Sealcoat Every Few Years

Sealcoating isn’t just about making asphalt look fresh and black. It adds a protective layer that shields the surface from UV rays, water, and chemicals. Aim to sealcoat every 3-5 years depending on traffic levels.

Fix Potholes Quickly

A single pothole can grow fast, especially with heavy traffic. Whether it’s a quick cold patch or a more durable hot mix repair, don’t delay in addressing these. Pothole repair should be a priority in any HOA maintenance plan.

Resurface When Needed

If your asphalt is looking worn but the base is still solid, resurfacing can give it a new lease on life. This involves adding a fresh layer of asphalt on top of the existing surface.

Tips for Concrete Maintenance

Keep It Clean

Regular cleaning, like sweeping and pressure washing, keeps your concrete looking good and prevents stains from setting in. Clean surfaces are a basic yet essential part of HOA maintenance.

Repair Cracks and Joints

Use flexible sealants to fill cracks and joints. This prevents water from getting in and causing further damage.

Resurface When Necessary

If your concrete looks tired but is still structurally sound, resurfacing can make it look like new without the cost of replacement.

Address Tree Root Damage

Roots lifting sidewalks is a common issue. Solutions include root pruning, installing barriers, or regrading the surface. Work with a professional to find the right fix. Proper management of tree root damage is often overlooked in HOA maintenance but is vital.

Fix Drainage Issues

Standing water isn’t just an eyesore—it’s a problem that can erode concrete over time. Make sure your drainage systems are working properly.

HOA Maintenance

Planning and Budgeting for HOA Maintenance

Have a Maintenance Plan

Every HOA should have a detailed maintenance plan that outlines inspection schedules, routine maintenance tasks, and long-term projects like resurfacing.

Work With the Pros

Hire a contractor who specializes in HOA maintenance. They’ll understand your unique needs and help you get the most out of your budget.

Budget for Repairs

Set aside money for both routine maintenance and unexpected repairs. A well-funded reserve can keep small problems from becoming financial emergencies.

Keep Residents in the Loop

Transparent communication about upcoming projects builds trust and cooperation. Let residents know when and why work is happening—and how it will benefit them. Open communication is an often underestimated part of effective HOA maintenance.

Eco-Friendly Options for HOA Maintenance

You can make maintenance more sustainable by using recycled materials, installing permeable pavements to reduce runoff, choosing low-VOC sealants, and using water-efficient cleaning methods.

Finding the Right Contractor for HOA Maintenance

When hiring a contractor, look for experience with a solid history of HOA work, references from other local HOAs, proper licenses and insurance, and comprehensive services. It’s often easier to work with a contractor who can handle everything from crack sealing to resurfacing.

Wrapping It Up

Taking care of your HOA’s asphalt and concrete doesn’t have to be overwhelming. With a proactive approach, regular inspections, and help from experienced professionals, you can keep your community looking sharp and running smoothly for years to come.

When you need expert help with HOA maintenance in San Jose and the Bay Area, give Calvac Paving a call. We’ve been serving HOAs across the region for decades, and we’re here to help your community shine. Reach out today to learn more!

Get more Bay Area concrete paving tips below:


7 Reasons a Driveway Fix Is a Cost-Effective Way to Boost Curb Appeal

7 Reasons a Driveway Fix Is a Cost-Effective Way to Boost Curb Appeal

Facebook
LinkedIn
Twitter
Pinterest
Driveway Fix

Your driveway is more than just a path leading to your garage; it’s one of the first things people notice about your home. A well-maintained driveway not only enhances the overall aesthetic of your property but can also significantly boost its value. Whether you’re planning to sell your home or simply want to improve its appearance, a driveway fix is a smart, cost-effective solution. In this blog, we’ll explore why driveway repairs are essential for boosting curb appeal and how they can save you money in the long run. Need help now? Visit Calvac Paving.

1. The Importance of Curb Appeal

Curb appeal refers to how attractive your home looks from the street. It’s the first impression visitors, neighbors, and potential buyers have of your property. A clean and visually appealing driveway plays a significant role in creating positive curb appeal. Cracks, stains, or uneven surfaces can make your home look neglected, no matter how pristine the rest of the property is.

Investing in a driveway fix ensures your property exudes charm and elegance, making it more inviting to everyone who visits or passes by.

2. Signs That Your Driveway Needs Repair

Before diving into repairs, it’s essential to recognize the signs of a deteriorating driveway. Here are some common indicators:

  • Cracks: Small cracks can quickly turn into larger ones if not addressed promptly. They’re often caused by weather fluctuations, heavy use, or poor installation.

  • Potholes: These not only create an eyesore but can also damage vehicles and pose safety risks.

  • Stains: Oil spills, grease, and other stains can make your driveway look aged and unkempt.

  • Uneven Surfaces: Over time, driveways may shift, creating bumps or dips that are unsightly and hazardous.

If you notice any of these issues, it’s time to consider a driveway fix to restore its functionality and appearance.

3. Cost-Effective Repairs vs. Replacement

One of the biggest advantages of driveway repairs is that they’re often more affordable than a full replacement. Here’s a breakdown of why repairs are a cost-effective option:

  • Lower Upfront Costs: Repairing cracks, filling potholes, and sealing the surface are less expensive than tearing out and replacing the entire driveway.

  • Extended Lifespan: Regular maintenance and minor fixes can extend the life of your driveway by several years, delaying the need for a costly replacement.

  • Energy Efficiency: Repairs use fewer materials and resources, making them a more sustainable choice.

By choosing a driveway fix over a full replacement, you’ll save money while still achieving a polished and professional look.

4. Driveway Repairs That Enhance Curb Appeal

To maximize the visual impact of your driveway, consider these repair options:

Crack Filling

Filling cracks not only prevents further damage but also gives your driveway a smoother and more uniform appearance. This simple fix can make a significant difference in how your driveway looks.

Sealcoating

Sealcoating adds a protective layer to your driveway, shielding it from UV rays, water, and chemicals. It also gives the surface a fresh, dark finish that looks brand new.

Resurfacing

For driveways with extensive wear and tear, resurfacing is an excellent option. This process involves applying a new layer of asphalt or concrete over the existing surface, effectively hiding imperfections and creating a flawless finish.

Edge Trimming

Neat, well-defined edges can make your driveway look more polished and professional. Consider trimming the grass or landscaping around the driveway to enhance its visual appeal.

Driveway Fix

5. The ROI of Driveway Repairs

Investing in a driveway fix offers a high return on investment (ROI). Here’s how:

  • Increased Property Value: A well-maintained driveway can add significant value to your home. Potential buyers are more likely to make higher offers when they see a property that’s been well cared for.

  • Better First Impressions: If you’re selling your home, curb appeal can be the difference between attracting multiple offers or struggling to find buyers.

  • Cost Savings: Addressing minor issues early prevents them from turning into major problems that require expensive repairs.

6. DIY vs. Professional Driveway Fixes

While some homeowners may attempt DIY repairs, hiring a professional offers several advantages:

  • Expertise: Professionals have the tools and knowledge to handle a variety of driveway issues efficiently and effectively.

  • Quality Materials: Professionals use high-quality materials that ensure long-lasting results.

  • Time Savings: A professional team can complete repairs much faster than a DIY project, saving you time and effort.

For the best results, it’s worth investing in a reputable paving company like Calvac Paving to handle your driveway fix.

7. Maintenance Tips for a Pristine Driveway

Once your driveway is repaired, regular maintenance is key to keeping it in top condition. Here are some tips:

  • Clean Regularly: Remove debris, leaves, and dirt to prevent staining and damage.

  • Seal Every Few Years: Apply a fresh coat of sealant every 2-3 years to protect your driveway and maintain its appearance.

  • Address Cracks Immediately: Fix small cracks as soon as they appear to prevent them from spreading.

  • Limit Heavy Loads: Avoid parking heavy vehicles or equipment on your driveway for extended periods.

Following these tips will help you preserve your driveway’s beauty and functionality for years to come.

Driveway Fix

8. Why Choose Calvac Paving for Your Driveway Fix?

At Calvac Paving, we specialize in high-quality paving services that enhance the beauty and durability of your driveway. Here’s why homeowners trust us:

  • Experience: With decades of experience, we’ve handled countless driveway repairs and upgrades.

  • Customized Solutions: We tailor our services to meet the unique needs of each client, ensuring optimal results.

  • Affordable Pricing: Our cost-effective solutions deliver exceptional value without breaking the bank.

  • Customer Satisfaction: We’re committed to exceeding your expectations, from the initial consultation to the final result.

Whether you need crack filling, sealcoating, or a complete resurfacing, our team has you covered. Let us help you transform your driveway into a stunning feature that enhances your home’s curb appeal.

Conclusion

A driveway fix is one of the most cost-effective ways to boost your home’s curb appeal. By addressing cracks, potholes, and stains, you can create a polished and inviting look that leaves a lasting impression. Regular maintenance and professional repairs not only enhance your property’s aesthetic but also save you money in the long run. If you’re ready to elevate your home’s curb appeal, contact Calvac Paving today to schedule your driveway repair. Together, we’ll make your driveway a feature to be proud of.

Get more Bay Area concrete paving tips below:


Concrete Patio Ideas: Transforming Outdoor Spaces

Concrete Patio Ideas: Transforming Outdoor Spaces

Facebook
LinkedIn
Twitter
Pinterest
concrete patio ideas San Jose

When it comes to creating a stylish and durable outdoor living area, concrete patios are a top choice for homeowners. This blog explores a variety of concrete patio ideas that blend functionality with aesthetic appeal, helping you transform your outdoor space into a beautiful and practical retreat.

Designing with Concrete

Concrete is not just functional; it’s also incredibly versatile. From traditional slabs to decorative stamped designs, concrete patios can be tailored to suit any style and preference. Here’s how you can use concrete to elevate your outdoor spaces:

  1. Stamped Concrete Patios: Mimic the look of natural stone, brick, or even wood with stamped concrete, which offers a cost-effective way to add a sophisticated touch to your patio.
  2. Colored Concrete: Enhance your patio’s appeal with colored concrete. Integrating colors into the mix can create a unique, inviting outdoor space that complements your home’s exterior.
  3. Polished Concrete: For a modern, sleek look, consider polished concrete. Its reflective surface can brighten up any area and make it look more spacious.

Incorporating Functional Features

A patio should be more than just beautiful; it should be functional too. Here are some ideas to enhance the usability of your concrete patio:

  • Built-in Seating: Incorporate permanent benches or seating walls to provide plenty of comfortable seating for guests.
  • Fire Pits and Fireplaces: Add a central feature like a fire pit or an outdoor fireplace. These features not only provide warmth on chilly evenings but also create a cozy gathering spot.
  • Outdoor Kitchens: Turn your patio into the ultimate entertainment zone with an outdoor kitchen. Concrete is highly durable and can easily support heavy appliances and fixtures.

Landscaping and Accessories

Softening the hard look of concrete with the right landscaping and accessories can make a world of difference:

  • Planters and Greenery: Use concrete planters or integrate green spaces into your patio design. This not only adds a splash of color but also brings life to your outdoor area.
  • Lighting: Proper lighting is crucial for any patio. Integrated LED lights or strategically placed lamps can enhance the ambiance and extend the usability of your patio into the evening.
  • Water Features: Incorporate a small fountain or a water wall to add a tranquil element to your patio, making it a perfect place for relaxation.

Maintenance and Care

Concrete patios are low maintenance but require some care to keep them looking their best. Regular cleaning and periodic sealing will protect your patio from weather elements and stains, ensuring it remains beautiful for years to come.

Conclusion

Concrete patios offer endless possibilities for outdoor living spaces. Whether you prefer a minimalist look or a luxurious design with all the amenities, concrete provides a solid foundation that can be customized in numerous ways. Explore these concrete patio ideas to create a space that’s not only functional but also a true extension of your home.


Start Your Concrete Patio With a Free Quote

For more concrete patio ideas and inspiration to elevate your outdoor space, whether you’re aiming for a minimalist design or a fully equipped outdoor entertainment area, we can turn your dreams into reality. Contact Calvac Paving today to start designing your ideal concrete patio.


Get more Bay Area concrete paving tips below: